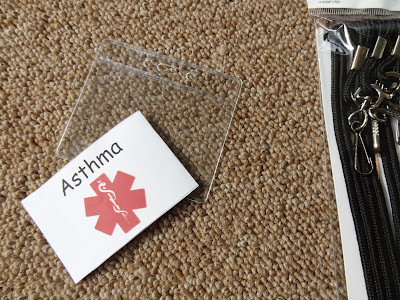
Our toddler has reactive airway disease. I did some online research and was unsure as to what kind of medical ID I should buy for a 17-month old (see my blog “Life still goes on“). We knew that we wanted all of his information to be available in whatever situation arises (drop-in childcare, baby-sitter, or even an accident) if one of us could not provide the information when needed. My husband came up with this wonderful idea: clear ID badges. We ran with it.
Today we stopped at Office Depot and bought the Office Depot brand adhesive name badges with the red label 100 count (compare to Avery self adhesive name badges item number 5143), Office Depot brand plastic badge holders 12 pack, a 10 pack of Office Depot brand black lanyards, and an Office Depot brand credential holder. (The credential holder hung with all the other name badge accessories; I just can’t find a link online. The item number is 313-412.) All of this cost around $ 25.
Our first decision was what we wanted to put on the ID. While our toddler does not have an asthma diagnosis, we felt that “asthma” would be easier for a caregiver to recognize than “reactive airway disease.” We also rationalized that our doctors do feel that our toddler is an asthmatic. So we went with “asthma.” We also decided to include his name, date of birth, allergies, daily medications, emergency contacts, and his pediatrician’s name and phone number. With that decided, I got to work.
I formatted a table with one cell in Word to fit the ID badge. The cell is 3.5″ x 3.3″. I then copied and pasted the entire cell until I had three rows of two. I found the graphic by Googling “medical alert symbol” and then copied and pasted it into a cell.
I then cut out a row…
…folded it in half…

…and slid it into the clear badge holder. On one side you see the graphic and the word “Asthma;” on the other side you see the medical information. I took the clip off the lanyard and put it on one of the badges. I could clip this to his clothing or jacket. I could attach a lanyard to one and hang it on the stroller. This ID is very versatile in its uses.
For the labels, I went to the website on the instruction sheet:
www.officedepot.com/papertemplates. Click on “Name badges” and upload the doc. I copied and pasted the same graphic and printed off 10 or so of the adhesive name labels. I plan on sticking these to his back when we use drop-in childcare or at the church nursery.
The credential holder, as it was called on the packaging, is going to be kept in our diaper bag. The diaper bag is with us whenever we leave the house and this is where I am going to keep all his information. I again used Word. I created the one cell table (3.3″ x 3″), copying and pasting the medical alert symbol and his medical information. I put all of this visible in the window. At the bottom, I wrote, “Pull out for Albuterol inhaler instructions.” In a childcare situation outside the home, the caregiver would need to know how to use the Albuterol inhaler until help arrives. On the other cell, I wrote instructions on how to administer the Albuterol.
I cut the table out…
…folded the paper in half…
…and slipped it into the holder.
Flipping the holder over, I slipped the adhesive labels into the back pocket.
I made a photo copy of our Asthma Management Plan and folded it up, sliding that in the zip pocket. Now, in an emergency, all of his information is right there with him.
The best part of our homemade medical ID is that I have all the documents for these tables saved on our computer. I actually already typed up and saved the table for if he goes on Orapred. I could print that off and slide the new table in our badge, then the EMT’s would know that he is taking Pulmicort and Opapred daily. Or, if his prescriptions get totally changed, I could enter in his new medications.


No comments:
Post a Comment